The decision has been made to dismantle the layout, a space of 11' x 11' is need for a new office for my existing Design Consultant ( http://www.kdcadd.com/ ) business, so the old office space can be utilized for the family. Tomorrow, I will start packing up rolling stock and such, then the demolition starts.
I will build a smaller and potable layout in the future info here https://nscaleprojects.blogspot.com/ , so for now. Thanks to all who have been following me in my N scale adventure.
Bye and take care all.
Dwyane
Friday, March 16, 2018
Saturday, February 25, 2017
Status of the Layout
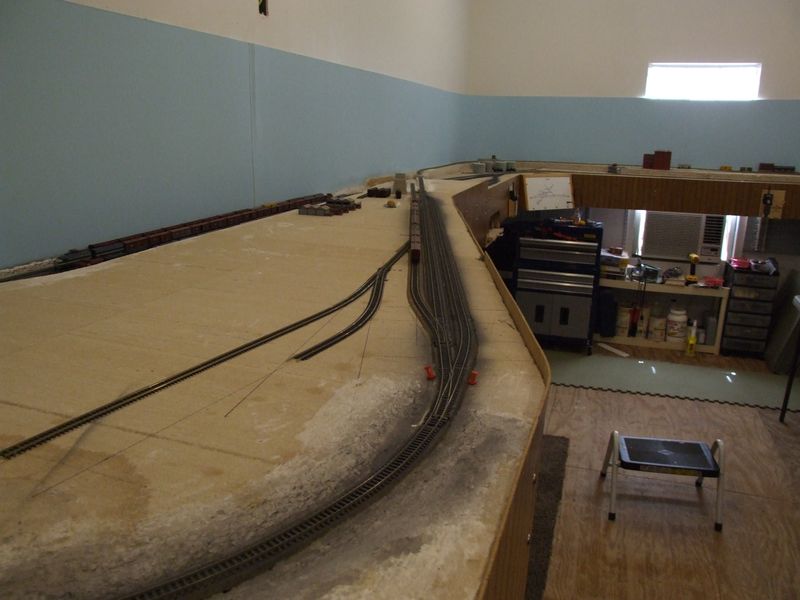
For some time I have been unable to work on the layout. Call it a road block or whatever, just not been happy with layout. What I have miss are the smaller layouts I have work on in the past, such as the 12x48 switching layout and couple of 24x48.
So for now (and has been for a while) work will halt on the T&P layout. No decision has been made to dismantle but the thought has cross my mind. I will just use it to test run/break-in engines and cars for now.
I do have some car projects, I want to finish and will post those here when completed.
I am experimenting with a couple of options.
1. T-Trak like modules but in another scale (TT).
2. N scale modular layout, 4-6 modules based on MR Milwaukee Beer Line Project.
More to come on these experiments.
Monday, January 23, 2017
Red River Models - T&P Muley Caboose
Wow, four months since my last post.
Over the holidays I acquired a laser cut wood T&P Muley Caboose kit from Red River Models (previously known as "The Marshall Shops").

I started with assembling the base core


Then added the siding

That is all for today.
Over the holidays I acquired a laser cut wood T&P Muley Caboose kit from Red River Models (previously known as "The Marshall Shops").

I started with assembling the base core


Then added the siding

That is all for today.
Saturday, September 10, 2016
More Box Cars
Today, I build 2 more kits got one more TP I-M kit left. I also renumber a few duplicate road number.


Four of the five were renumber.


Four of the five were renumber.
Sunday, June 26, 2016
New Project - 140' Thru Plate Girder Bridge - Final Part
Over the last few days, I manage to finish the 140' Bridge install and get trains running again.


Next project clean up layout and room


Next project clean up layout and room

Sunday, June 5, 2016
June Update
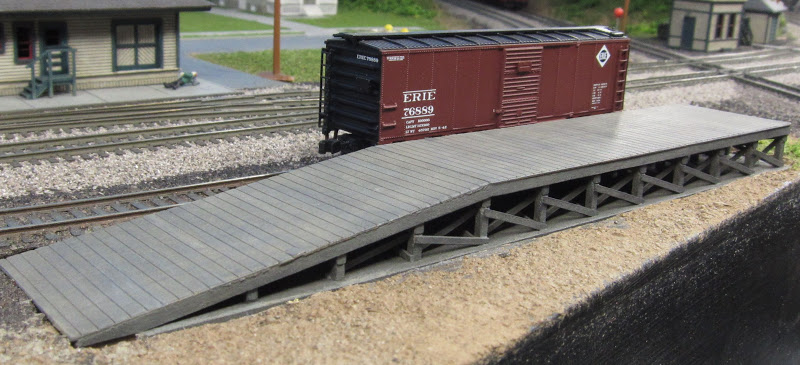
Here my monthly update...Not a lot going on been busy with work and other TT scale projects, but I did do a little painting on both the bridge and loading platform and some attempt at weathering on the bridge.
Loading Platform


Bridge


Loading Platform


Bridge


Thursday, May 5, 2016
New Project - 140' Thru Plate Girder Bridge - Bridge Shoes
Sorry for the lack of progress, but I been focusing on other project and my drafting service business new client back to working 30 hrs a week.
I did manage to get some bridge shoes designed and 3D printed.


I did manage to get some bridge shoes designed and 3D printed.
Friday, April 1, 2016
Loading platform
I was contacted a week ago by a fellow N Scaler that was looking for a loading platform. He came across my blog and saw my TOFC loading platform and ask if I would sell him one. I agree and send him one Monday.
He modified it into just a loading platform.

Cool to see your work on others layouts.
He modified it into just a loading platform.
Cool to see your work on others layouts.
Friday, March 11, 2016


Monday, January 4, 2016
New Project - 140' Thru Plate Girder Bridge - Part 7 Abutments
A little work over the holidays, applied first and second coat of texture to bridge abutments. Initially coated abutments with a cheap gray primer rattle can paint from Walmart. Then was a mixture of lite-weight joint compound, water and black/tan paint to a consistency of thick tomato soup.
Second coat applied today


Once dried, I will sand hi-points and if needed a third coat.
Also started a little ground work in area behind bridge

On another note, I created a new blog for my interest in TT Scale modeling (1:120) http://ttscalemodeling.blogspot.com/ , so if your interested in TT Scale come follow me there.
Monday, December 28, 2015

Tuesday, December 15, 2015
New Project - 140' Thru Plate Girder Bridge - Part 6 Abutments
So the polystyrene abutments did not work out and after two other fail attempts. I final got a pair of bridge abutments I like.
These are laser cut from 1/16" taskboard.


Need to primer them and determine finish for them. Also need to make some bridge shoes.
These are laser cut from 1/16" taskboard.


Need to primer them and determine finish for them. Also need to make some bridge shoes.
Friday, December 4, 2015
New Project - 140' Thru Plate Girder Bridge - Part 5 Install
After a month of not working on the layout. Today I got back at it.
I bit the bullet and cut the track to remove the old CV bridge.

Then I remove some of the inclines on both sides to lower the grade up to the bridge. Also while the bridge is out of the way. I cut away and shape the ceiling tile behind the bridge. Something I forgot to do last time.
Here the bridge temporary in place.


The bridge track is CV bridge ties left over from another project with Atlas code 55 rail.
Start making some simple concrete bridge abutments by gluing some 0.1" white styrene together. Once they dry I can start shaping them.

Applied gray primer to the bottom side of the bridge too.

I have not decided on a final color yet, leaning toward silver/gray.
See Ya...
Subscribe to:
Posts (Atom)