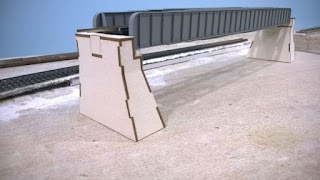
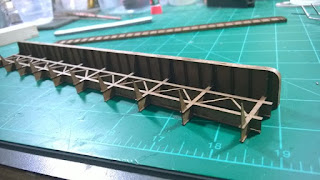
So the polystyrene abutments did not work out and after two other fail attempts. I final got a pair of bridge abutments I like.
These are laser cut from 1/16" taskboard.
Need to primer them and determine finish for them. Also need to make some bridge shoes.
Showing posts with label Structures. Show all posts
Showing posts with label Structures. Show all posts
Tuesday, December 15, 2015
Friday, December 4, 2015
New Project - 140' Thru Plate Girder Bridge - Part 5 Install
After a month of not working on the layout. Today I got back at it.
I bit the bullet and cut the track to remove the old CV bridge.
Then I remove some of the inclines on both sides to lower the grade up to the bridge. Also while the bridge is out of the way. I cut away and shape the ceiling tile behind the bridge. Something I forgot to do last time.
Here the bridge temporary in place.
The bridge track is CV bridge ties left over from another project with Atlas code 55 rail.
Start making some simple concrete bridge abutments by gluing some 0.1" white styrene together. Once they dry I can start shaping them.
Applied gray primer to the bottom side of the bridge too.
I have not decided on a final color yet, leaning toward silver/gray.
See Ya...
Saturday, October 31, 2015
New Project - TOFC/Team Track Loading Ramp
Not sure I have given this post the correct name, but I wanted to have a TOFC unload/load ramp and a loading ramp for a team track on the layout. For the last couple months I have been researching these type of ramps and decided on a combination TOFC/Team track loading ramp.
After three attempts at a design and test cutting on the laser and test assembly, below is the results of yesterday and today assembly.
Sorry about the light reflection from the plate glass I was assembling on.
Below, I have placed it were it will be located once finished
Next is to paint this portion and then laser cut the platform/ramp decks.
Tuesday, September 29, 2015
New Project - 140' Thru Plate Girder Bridge - Part 4
Tomorrow turn into 10 days. My back started bothering me again and a trip to the doc plus the medicine prevented me from doing anything for the last 10 days.
Today I got back out to the train room and pickup where I left off.
First up was finishing installing the vertical leg to each angle position.
Next to add the side girders to the base structure
Flip bridge over an install the bottom cross bracing
At this point if you wanted a ballast deck you would need to install the floor plate, as the next step would prevent it's installation. I did cut one to see how it would look, but I made an error on it and it did not fit.
Moving on to adding the top flange to the inside web plates and the top and bottom cap plates.
I did not cut enough cap plates for the bottom of the girders, so will need to cut them and install before painting.
So that is basically the completed bridge less paint, weathering and lettering. If I do decide to market this as a kit. I will need to go back to the design stage to make some adjustments and two changes.
Saturday, September 19, 2015
New Project - 140' Thru Plate Girder Bridge - Part 3
Today , I got back to working on this project. I make the needed adjustments in the parts and laser cut out the new parts.
First five installed
Above are the new parts. below I will start with gluing the lower flange onto the web piece.
Next the top flange
Once the top flange is in place and glued. Then I work the each end. I like to bend the piece around the corner a couple times so it starts assuming the round corner shape before trying to glue it.
Two girder are completed to this stage with their flanges in place
Next is to insert the overlays that provide the angle detail
Completed the overlay stage
The over lay stage is where I had issue last time, initially my thought was a dimensional error or humidity, but today I tried a different approach to each girder and discovered it was the glue decreasing clearances. The one glued with ACC when together the best. I am going to adjust the dimension a little more to account for this.
Next up is the final pieces and the most tedious part, adding the vertical leg to each angle position.
The vertical pieces
First five installed
So that it for today, going to finish the remaining pieces tomorrow.
Subscribe to:
Posts (Atom)


